I have many customers that have trouble with getting a Great Impression and that is where Producing a Great Custom Flipper Starts. A poor first impression can add to the time between placing an order and receiving your Flipper in the mail and causes frustration because you have been waiting long enough to smile again ! I am writing this blog to provide clarity by answering some of the questions and difficulties that I have heard from my customers.
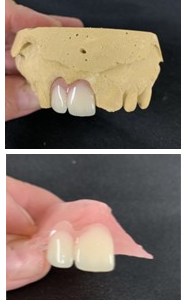
At Designs In Ortho we offer 1-2 tooth Flippers as well as other oral health products such as Mouthguards, Nightguards and Whitening Guards. We utilize two types of Flippers; The Full Arch type, which has teeth attached to both sides of a dental arch of acrylic on the palate side of the mouth, and The Nesbit type which is a smaller type for 1 or sometimes 2 teeth in the same area of the dental arch and utilizes acrylic on the inside and outside of the area around the missing tooth.
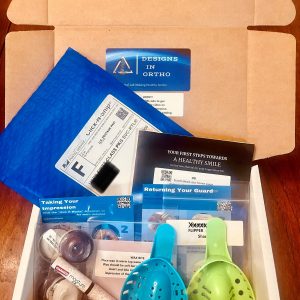
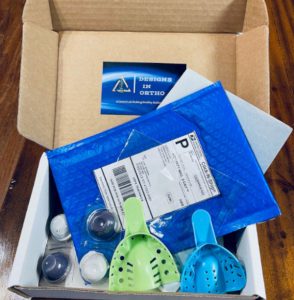
Included in your kit you will find impression trays, two sets of putty, bite registration wax, tooth shade samples, written instruction materials and links to instruction videos. We have also included a pre-paid mailing label and bubble mailer to return your order and lip balm so your lips do not crack when doing your impression. You can order our kit separately on our website
FOLLOW THESE 7 STEPS FOR TAKING A GREAT IMPRESSION
STEP ONE: READ AND WATCH ALL INSTRUCTION MATERIAL BEFORE TAKING YOUR IMPRESSION
Before taking your great impression, floss and brush your teeth and wash your hands: Use the lip balm included in your impression kit. Next, gather your kit and supplies; You will need a mirror, timer, and paper towels.
After you have read the instructions, lay out the kit you received from DIO and begin the important first step of trying in your tray in front of a mirror.
- Try in the largest tray first and use that one if it fits. The tray should not rub your teeth and should be seated until ALMOST touching the tray.
- The tray should extend to include the back teeth.
- The front teeth should be close to but not touching the tray and the tray should be pushed up toward the nose as far as possible to get full detail of the teeth and gums.
- Pull the lip to the outside of the tray to avoid interference in the impression. If you are doing a lower impression be sure to lift the tongue and touch the roof of your mouth to avoid interference from your tongue
- Indentation in the center of the tray should line up with the center of your dental arch
- After seating, your tray should be parallel to the ground
STEP TWO: PREPARING PUTTY FOR THE TRAY
You have cleaned your teeth, chosen your tray, and read and watched all instruction materials. Following the instructions below do a “dry run” then use our putty using the same instructions to take your impression. We do not use the standard alginate material that patients sometimes feel is “Runny” or causes you to gag. Our impression material is is a stable and flexible material and under normal circumstances will not damage fillings or other dental work including braces.
- With dry fingers remove the putty from both sets of containers and set them aside, keeping the colors separate. Set your timer for 2 min and 30 seconds. Next, after having reviewed all of the instructions, pick up your putty, start your timer, and in a rapid motion knead all putty together for approximately 30 seconds until the two colors become one color of purple as shown in the attached photo
STEP THREE: LOADING TRAY
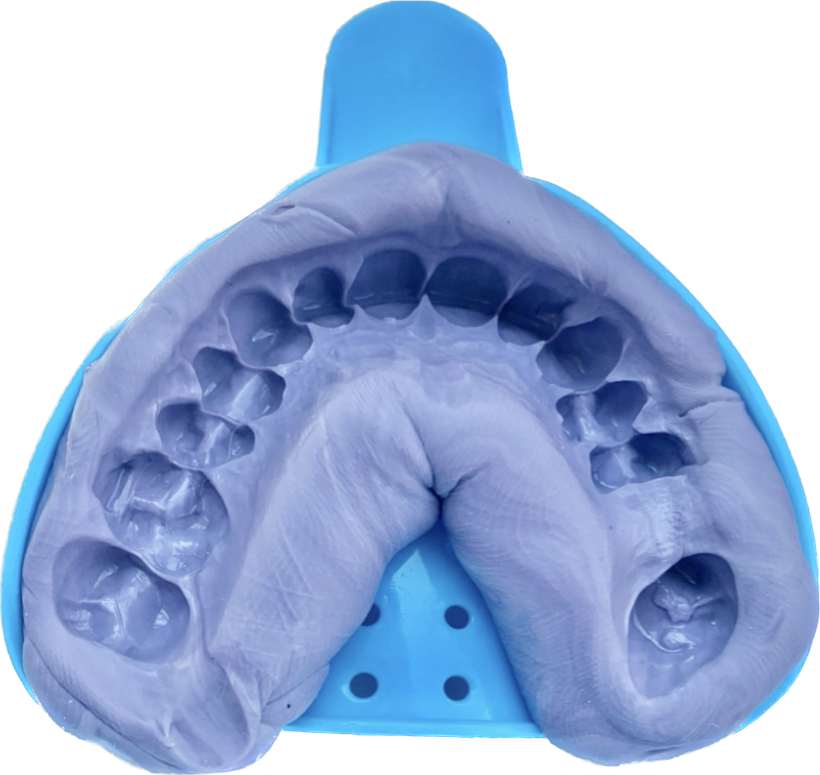
- Roll the putty into a sausage shape approx. 4 inches long and place in the chosen tray as shown below. Pressing very slightly to bring some putty toward the center of the tray.
STEP FOUR: INSERTING AND SEATING YOUR TRAY
- In front of a mirror insert the tray in your mouth at around 35- 40 seconds of the timer setting, lining up the center of the tray with the center of your dental arch.
- Begin to seat the back teeth first as it is important they are included, Slide a finger under your lip and lift it outside of the tray to prevent obstruction and allow the tray to fully seat. Next, roll the tray up to seat the front teeth. As you are seating the tray, slide a finger under your lip and lift it outside of the tray to prevent obstruction and allow it to fully seat.
- Apply strong pressure toward the teeth by pressing hard on the tray, up toward the nose or toward the chin, to include detail of the teeth and gums.
- After seating your tray, press back slightly toward your front teeth before the timer reaches 60 seconds. This is where a practice run with the timer is helpful. Many customers find their putty set too quickly, so a run with the timer will give you a “Feel” for how long you have to knead the putty together, to place in the tray and to insert it into your mouth
- Place both thumbs midway on the bottom of your tray and apply pressure toward your teeth. Continue to apply equal pressure while keeping the tray parallel to the ground until seated far enough to include several mm of tissue above or below your gum line. (Your teeth should ALMOST touch the tray leaving a thin layer of putty between your teeth and the tray)
- *Preparing, Loading, Inserting, and Seating your tray should take approximately 45- 60 seconds
**Do not continue to apply pressure or move the tray after 60 seconds. This will result in an unusable impression** - We offer additional putty on our Etsy site.
STEP FIVE: WAITING FOR MATERIAL TO SET
After the tray is seated you may partially close your mouth but do not bite down. Now relax and breathe through your nose. Use a paper towel to catch your drool as you wait the remaining 90 seconds for the putty to set (it should have taken no more than 60 seconds to have the tray seated) Seating the tray and waiting for it to set should take a total of 2 min and 30 secs Maybe listen to your favorite song to take your mind off of the impression?
STEP SIX: REMOVING THE TRAY
At 2 min and 30 sec Remove the tray by slowly wiggling it from side to side, releasing suction as you pull the tray down and away from your teeth. Sometimes there is a strong suction and getting a finger between the impression and gum tissue will help it release.
STEP SEVEN: PREPARING YOUR IMPRESSION FOR RETURN
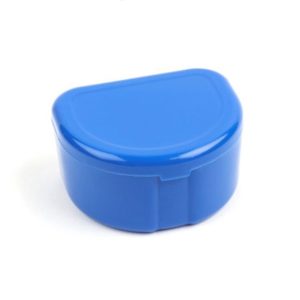
Leave your impression in the tray and rinse thoroughly. Let it air dry before placing it in the baggie provided for its return to our lab. Remember to include your Order Form and any extra materials in your return
Now that you have taken a Great Impression we can produce a Great Flipper or other oral health appliance.
**Please send us a photo to confirm it is a usable impression. Contact us via Email, or text at [email protected] or 859.363.1419. If your impression is unusable we can ship new putty right away.

Tray Loaded Example