Taking Your Impression
PREPARING FOR YOUR IMPRESSION
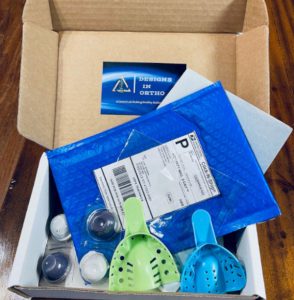
Included in your kit you will find impression trays, two sets of putty, an instruction brochure with descriptions of our Guards, and an order form on the back. We have also included a pre-paid mailing label, baggies, and bubble mailer to return your order.
READ INSTRUCTIONS CAREFULLY AND VISUALIZE THE PROCESS BEFORE TAKING YOUR IMPRESSION
Before taking your impression floss and brush your teeth and wash your hands; You may want to use your favorite lip balm. Next, gather your kit and supplies; You will need a mirror, timer, and paper towels.
After you have read the instructions, lay out the kit you received from DIO and begin the important first step of trying in your tray in front of a mirror.
- Try in the largest tray first and use that one if it fits. The tray should not rub your teeth and should be seated until ALMOST touching the tray.
- The tray should extend to include the back teeth.
- Indentation in the center of the tray should line up with the center of your dental arch.
- After seating, your tray should be parallel to the ground
TAKING YOUR IMPRESSIONS
You have cleaned your teeth, chosen your tray, and filled out your order form on the back of this brochure. Following the instructions below do a “dry run” then use our putty and the same instructions below to take your impression. Our impression material is flexible and under normal circumstances will not damage fillings or other dental work including braces
STEP ONE: PREPARING PUTTY FOR THE TRAY
With dry fingers remove the putty from both sets of containers and set them aside, keeping the colors separate. Set your timer for 2 min and 30 seconds. Next, pick up your putty, start your timer, and in a rapid motion knead all putty together for approximately 30 seconds until the two colors become one as shown above.
STEP TWO: LOADING TRAY
Roll putty into a sausage shape approx. 4 inches long and place in the chosen tray as shown
STEP THREE: INSERTING TRAY
In front of a mirror insert the tray in your mouth at around 35- 40 seconds, lining up the center of the tray with the center of your dental arch.
STEP FOUR: SEATING TRAY
- Seat the back teeth first as it is important they are included, then roll the tray up seating the front teeth last. Then press back slightly toward your front teeth.
- Place both thumbs midway on the bottom of your tray and press up toward your teeth while applying equal pressure and keeping the tray parallel to the ground.
- Slide a finger under your lip and lift it outside of the tray to prevent obstruction and allow it to fully seat.
- Continue thumb pressure until seated far enough to include several mm of tissue above your gum line. (Your teeth should ALMOST touch the tray leaving a layer of putty between your teeth and the tray)**Preparing, Loading, Inserting, and Seating your tray should take approximately 45- 60 seconds
**Do not continue to apply pressure or move the tray after 60 seconds. This will result in an unusable impression
STEP FIVE: WAITING FOR MATERIAL TO SET
After the tray is seated you may partially close your mouth but do not bite down. Now relax and breathe through your nose. Use a paper towel to catch your drool as you wait the remaining 1 min and 30 sec for the putty to set 🙂
STEP SIX: REMOVING THE TRAY
At 2 min and 30 sec Remove the tray by slowly wiggling it from side to side, releasing suction as you pull the tray down and away from your teeth.
STEP SEVEN: PREPARING YOUR IMPRESSION FOR RETURN
Leave your impression on the tray and rinse thoroughly. Let it air dry before placing it in the baggie provided for its return to our lab. Remember to include your Order Form and any extra materials in your return
**If you are unsure of the quality of your impression or have any other questions, please send us a photo and/or contact us via Email, phone, or text at [email protected] or 859.363.1419. If your impression is unusable we can ship new putty.

Tray Loaded Example

Good Impression Example
Contact Us
Text
(859) 363 - 1419
Phone
Address
13145 Green Road
Walton, KY 41094